Monday, February 10, 2014

Alternatives to Obamacare

Alternatives to Obamacare


By Jason Francis Smith

I saw a blog post today in the Weekly Standard called: A Winning Alternative to Obamacare.  You can read it if you like, just click on the link.  Yet the interesting thing about the whole thing to me is how it relates to the preparedness industry.  So conservatives are putting forth alternatives to Obamacare, and it shows you how foolish they have been for so long.  One of the reasons Obama succeeded in passing his healthcare bill is that he HAD A PLAN.  We might not AGREE with the plan, but he took the initiative, he pushed it forward, he set the agenda.  What did conservatives do?  Were they the leaders on this issue?

See what I'm saying?  It's about being prepared.  The world can and will do things to you... but if you get prepared, YOU SET THE AGENDA.  I think this concept is worth contemplating for every American in this great country of ours. I'm not taking sides here... I'm saying someone grabbed the bull by the horns and made something happen.  We can do the same, in our own lives. 

Ways to start a fire without matches

Ways to start a fire without matches!

survival fire

Fire is the difference between life and death! Stay alive with these tools!

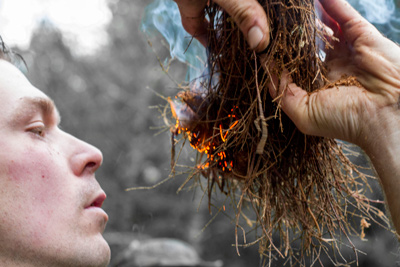
There is a primal link between man and fire. Every man should know how to start one. A manly man knows how to start one without matches. It’s an essential survival skill. You never know when you’ll find yourself in a situation where you’ll need a fire, but you don’t have matches. Maybe your single engine plane goes down while you’re flying over the Alaskan wilderness, like the kid in Hatchet. Or perhaps you’re out camping and you lose your backpack in a tussle with a bear. It need not be something as dramatic at these situations-even extremely windy or wet conditions can render matches virtually uselessly. And whether or not you ever need to call upon these skills, it’s just damn cool to know you can start a fire, whenever and wherever you are.
1 – Hand Drill
The hand drill method is by far the most difficult of the friction based methods. It works best in an extremely dry environment with the proper woods and tinder. Generating enough speed with the spindle is usually most people’s problem.
Step 1 – Cut a v-shaped notch into your fireboard then place a small notch next to for your spindle to rest in. Underneath your notch place a piece of bark to catch the ember. Your goal is to create an ember from the friction of the spindle and the fire board. The spindle should be roughly two feet long. TIP: Your spindle should be no more than 1/2″ thick. The thicker the spindle the less speed you will be able to spin it at which means not enough friction and a cold night.
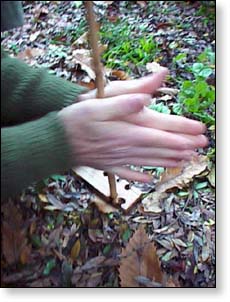
Step 2 –   Place your spindle in the notch on the fire board and begin to roll the spindle in between your palms working your hands down the spindle while keeping a light pressure. Continue to repeat this until you see some smoke. When you see smoke take your fire board and tap it on to the bark and transfer the ember to the tinder bundle while gently blow into a flame.
hand drill to mke a fire
2 – Two-Man Friction Drill
The two man friction drill is a little easier than the hand drill as two people are able to generate more friction.
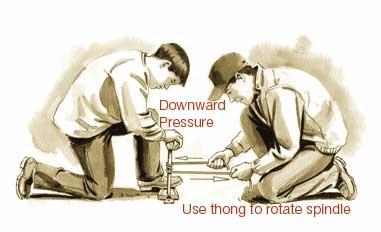
Step 1 – You will use the same materials as a hand drill but you will also need a rope, shoe lace or even a thin flexible branch from a small tree can work. Wrap the rope around your drill and have one person apply downward pressure on the drill with a rock or another piece of wood. The second person will rotate the spindle by pulling back and forth on the shoe lace.
Step 2 – Once again, when you see smoke remove the drill and knock the ember from the fire board into your tinder bundle and blow to life.
two-man friction drill
3 – Fire Plough
The fire plow is another primitive fire starting method that uses a fire board and spindle.  This method also requires a very dry climate and the proper wood to work.  I have found a lot of success with cedar with this method due to the fact that cedar creates its own natural tinder from the friction ahead of the spindle.
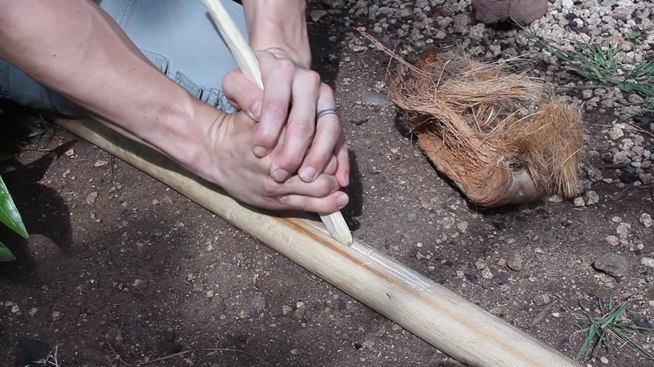
Step 1 – Cut a groove down the middle of your fireboard from one end to the other.  Rub the spindle up and down the groove while applying light pressure until the dusty particles ignite into an ember.  Place in your tinder and blow to life.
TIP: Go to slow and you won’t create enough heat but go to fast and you will burn out.  A steady medium pace works best with this method.
fire plough
4 – Bow Drill
Of all the friction based fire starting methods the bow drill is the most efficient.  Once again success usually comes down to the type of wood you are using.
Step 1 – Notch your fire board and place an indentation next to the notch to place the spindle, sames as a hand drill. Attach a string to the ends of a stick forming a bow.
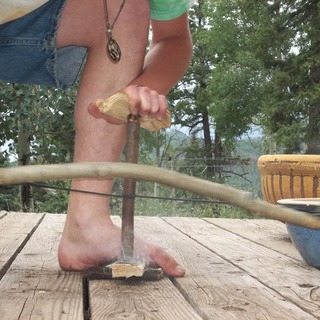
Step 2 – Apply a light pressure on top of your spindle with a socket. A socket is simply a piece of wood with an indentation for the top of the spindle to rotate in. Wrap the bow around your spindle once and begin to pull back and forth.
Step 3 – As you begin to see smoke tap your fire board until all of you embers are on your piece of bark. Take your embers and put them in your tinder bundle and blow till you see a flame.
bow drill
5 – Magnifying Glass
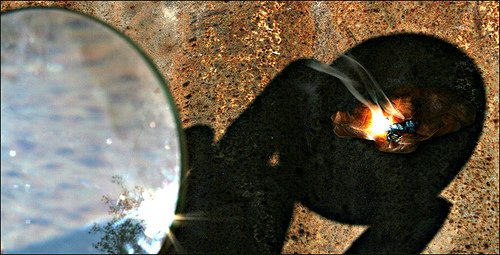
This is a very effective method when the conditions are right. You will need a sunny day, so you must plan appropriately and start your fire when you may not need it.
Step 1 – Gather up a tinder pile and begin to focus the magnifying glass by tilting it until you direct the suns light into the smallest beam possible.  Generally if the sun is strong enough you will have a fire within a minute.  Once your tinder flames up apply some small branches to get your fire going.
magnifying glass
6 – Soda Can and Chocolate Fire
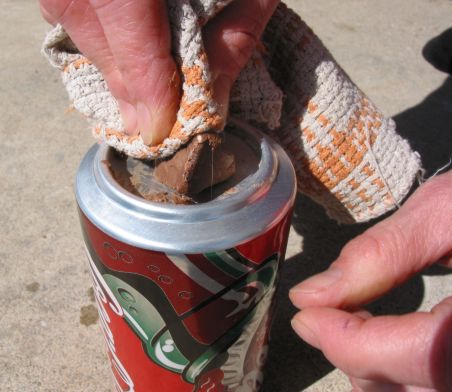
This method is not nearly as effective as using a magnifying glass but in a true survival situation it does work.
Step 1 – Polish the bottom of a can with a cloth and chocolate if you have it. You can substitute the chocolate with some clay, wet sand or damp dirt. Just like the magnifying glass, use the bottom of the can to create the smallest beam of light possible directing the suns energy onto your tinder.
soda can and chocolate
7 – Flint and Steel
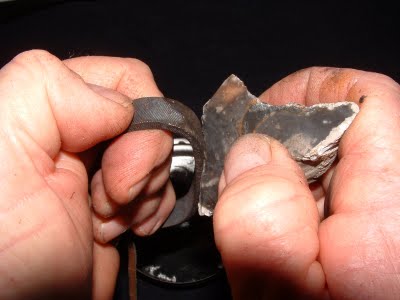
Striking a softer flint against a piece of steal will create sparks to start a fire. This works best if you have a piece of char cloth but if you don’t you will need some very dry and fine tinder.  Generally an older piece of rusted steel works best. Trying this will your stainless steel knife won’t be effective. You can also substitute a piece of quartzite instead of flint.
Step 1 – Strike your piece of steal against your flint to generate a spark directly into your tinder bundle. You will have to repeat this several times until you get a large enough spark to create an ember in your tinder pile. As always, when you have a large enough ember blow it into a flame and apply to your kindling.
flint and steel
8 – Magnesium Stick
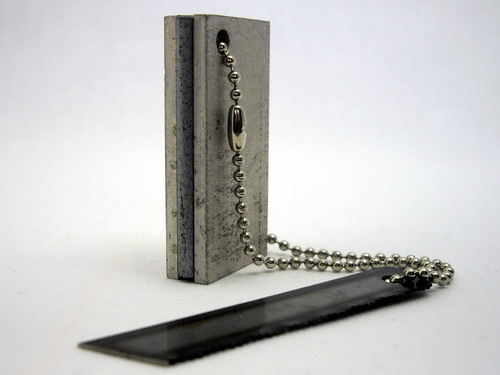
Using a magnesium stick is hands down the most effective way to start a fire in the wilderness. A magnesium stick will produce a flame source of over 5000 degrees Fahrenheit.  A few degrees hotter than our bow drill.  :) The advantages of a magnesium stick in a true survival situation are it will start dozens of fires, can get wet and only take a few seconds.
Step 1 – Use your knife to shave off a few small pieces of magnesium into your tinder bundle. Take your knife or a rock and strike it down the side of the fire steel to create a spark into your tinder pile. Some of the sparks will hit the magnesium igniting a 5000 degree inferno which will get your tinder lit. It’s that easy.
All the ways to start a fire without a match I taught in this class will work with a little practice and the right tools. You can do some searches and find some kits online for each of the methods we discussed. As always make sure to use caution and common sense when starting a fire. Help save our forests and use responsibility and make sure to never leave a fire until it’s fully extinguished. Enjoy!
magnessuim striker
Remember:
Friction fire starting techniques are some of the most primitive and difficult ways to start a fire. The type of wood you use and tinder when using this process will determine a warm night by the fire or shivering in the cold. Without the right wood you won’t get a coal and with poor tinder you won’t get a fire going even with matches.
The best tinder is always the driest and most flammable/finest tinder. Some good examples include: dry tall grass, cotton tails, cedar tree shavings or dried leaves.  The preferred woods are dry soft woods including juniper, aspen, willow and cottonwood. The friction of a spindle into a fireboard will produce a coal when the surface temperature reaches 800 degrees Fahrenheit. Once you have an ember it is transferred to your tinder bundle and gently blown to life.

Starving and Afraid?

Starving and afraid?

Here is a list of a few edible plants that grow wild in North America

So you’re stranded in the wilderness. You consumed the last nub of your Clif Bar two days ago, and now you’re feeling famished. Civilization is still several days away, and you need to keep up your strength. The greenery all around you is looking more and more appetizing. But what to nibble on? Some plants will keep you alive and are chock full of essential vitamins and minerals, while some could make you violently ill….or even kill you.
Which of course makes proper identification absolutely critical.
Plants to Avoid
If you can’t clearly identify a plant and you don’t know if it’s poisonous, it’s better to be safe than sorry. Steer clear from a plant if it has:
Milky or discolored sap
Spines, fine hairs, or thorns
Beans, bulbs, or seeds inside pods
Bitter or soapy taste
Dill, carrot, parsnip, or parsley-like foliage
“Almond” scent in the woody parts and leaves
Grain heads with pink, purplish, or black spurs
Three-leaved growth pattern
Many toxic plants will exhibit one or more of the above characteristics. Bear in mind that some of the plants we suggest below have some of these attributes, yet they’re still edible. The characteristics listed are just guidelines for when you’re not confident about what you’re dealing with. If you want to be completely sure that an unknown plant is edible, and you have a day or two to spare, you can always perform the Universal Edibility Test.
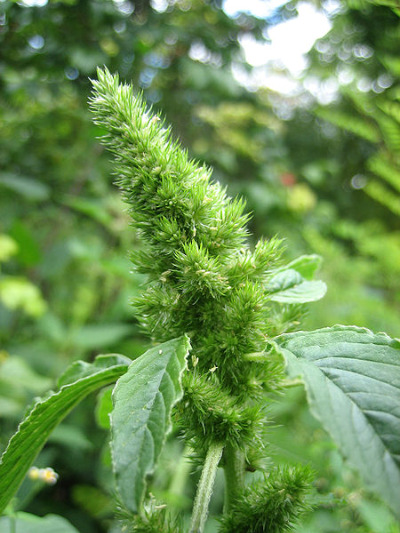
Amaranth (Amaranthus retroflexus and other species)
plant 1 edible
Native to the Americas but found on most continents, amaranth is an edible weed. You can eat all parts of the plant, but be on the lookout for spines that appear on some of the leaves. While not poisonous, amaranth leaves do contain oxalic acid and may contain large amounts of nitrates if grown in nitrate-rich soil. It’s recommended that you boil the leaves to remove the oxalic acid and nitrates. Don’t drink the water after you boil the plant. With that said, you can eat the plant raw if worse comes to worst.
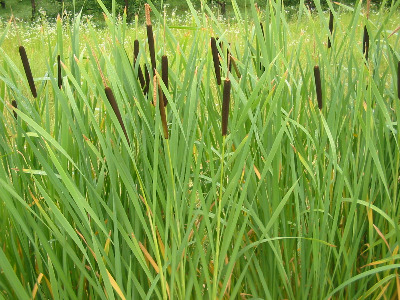
Cattail (Typha)
plant 2 edible
Known as cattails or punks in North America and bullrush and reedmace in England, the typha genus of plants is usually found near the edges of freshwater wetlands. Cattails were a staple in the diet of many Native American tribes. Most of a cattail is edible. You can boil or eat raw the rootstock, or rhizomes, of the plant. The rootstock is usually found underground. Make sure to wash off all the mud. The best part of the stem is near the bottom where the plant is mainly white. Either boil or eat the stem raw. Boil the leaves like you would spinach. The corn dog-looking female flower spike can be broken off and eaten like corn on the cob in the early summer when the plant is first developing. It actually has a corn-like taste to it
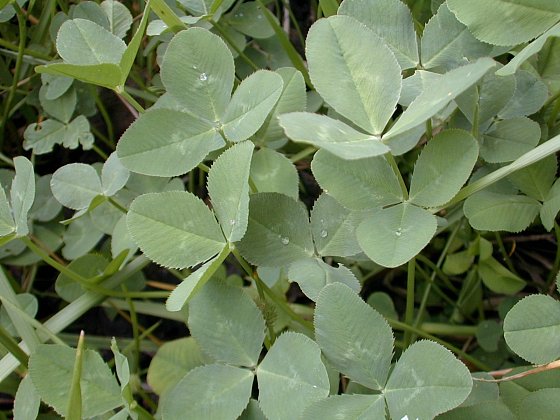
Clovers (Trifolium)
plant 3 edible
Lucky you-clovers are actually edible. And they’re found just about everywhere there’s an open grassy area. You can spot them by their distinctive trefoil leaflets. You can eat clovers raw, but they taste better boiled.
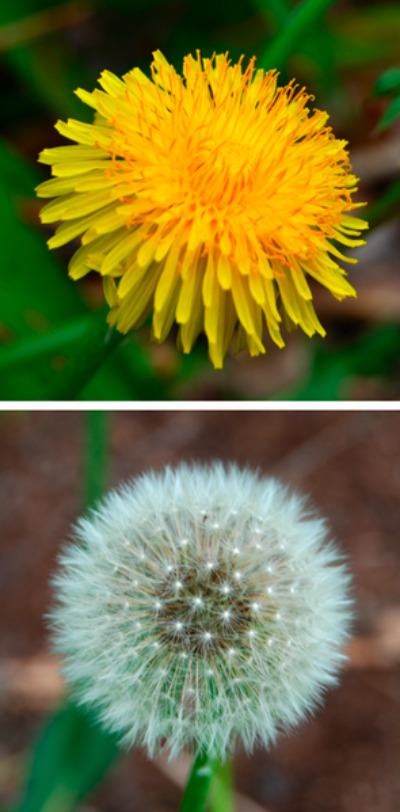
Dandelion (Taraxacum officinale)
plant 4 edible
Sure, it’s an obnoxious weed on your perfectly mowed lawn, but when you’re out in the wild this little plant can save your life. The entire plant is edible- roots, leaves, and flower. Eat the leaves while they’re still young; mature leaves taste bitter. If you do decide to eat the mature leaves, boil them first to remove their bitter taste. Boil the roots before eating as well.  You can drink the water you boiled the roots in as a tea and use the flower as a garnish for your dandelion salad.
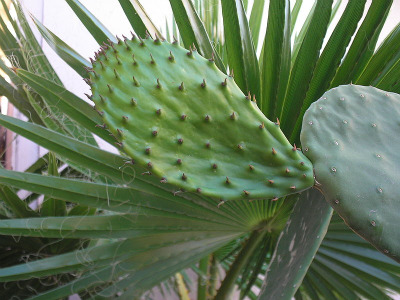
Prickly Pear Cactus (Opuntia)
plant 5 edible
Found in the deserts of North America, the prickly pear cactus is a very tasty and nutritional plant that can help you survive the next time you’re stranded in the desert. The fruit of the prickly pear cactus looks like a red or purplish pear. Hence the name. Before eating the plant, carefully remove the small spines on the outer skin or else it will feel like you’re swallowing a porcupine. You can also eat the young stem of the prickly pear cactus. It’s best to boil the stems before eating.
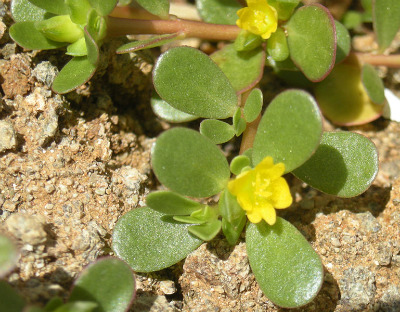
Purslane (Portulaca oleracea)
plant 6 edible
While considered an obnoxious weed in the United States, purslane can provide much needed vitamins and minerals in a wilderness survival situation. Ghandi actually numbered purslane among his favorite foods. It’s a small plant with smooth fat leaves that have a refreshingly sour taste. Purslane grows from the beginning of summer to the start of fall. You can eat purslane raw or boiled. If you’d like to remove the sour taste, boil the leaves before eating.
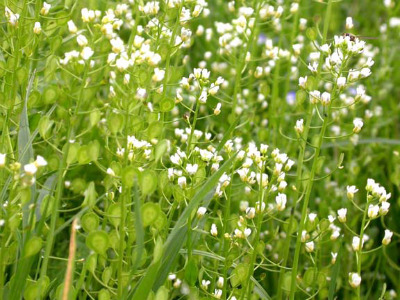
Field Pennycress (Thalspi vulgaris)
plant 7 edible
Field Pennycress is a weed found in most parts of the world. Its growing season is early spring to late winter. You can eat the seeds and leaves of field pennycress raw or boiled. The only caveat with field pennycress is not to eat it if it’s growing in contaminated soil. Pennycress is a hyperaccumulator of minerals, meaning it sucks up any and all minerals around it. General rule is don’t eat pennycress if it’s growing by the side of the road or is near a Superfund site

These are only a fraction of all the edible plants in North America. If your are going on a long camping trips, or even a hike through the woods do yourself a favor and brush up on all the edible plants in your area and also what’s in bloom for that time of year. It might seem silly and you might have packed enough food for the trip, but when accidents happen (and they DO happen) you will be wishing u had taken the time to learn the #1 survival trick. Edible plants can save a life!

2014 Winter Olympics

2014 Winter Olympics      

Here are some interesting facts!

-The early Olympic Games were celebrated as a religious festival from 776 B.C. until 393 A.D., when the games were banned for being a pagan festival (the Olympics celebrated the Greek god Zeus). In 1894, a French educator Baron Pierre de Coubertin, proposed a revival of the ancient tradition, and thus the modern-day Olympic Summer Games were born.
-Host Greece won the most medals (47) at the first Olympic Summer Games in 1896.
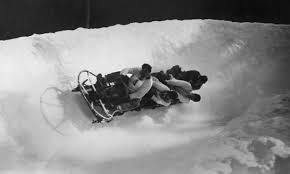
-The first Winter Olympic Games were held in Chamonix, France in 1924.
-Norway has won the most medals (263) at the Winter Games.
-The United States has won more medals (2,189) at the Summer Games than any other country.
-The five Olympic rings represent the five major regions of the world – Africa, the Americas, Asia, Europe and Oceana, and every national flag in the world includes one of the five colors, which are (from left to right) blue, yellow, black, green, and red.
-Up until 1994 the Olympics were held every four years. Since then, the Winter and Summer games have alternated every two years.
-The first Olympics covered by U.S. television was the 1960 Summer Games in Rome by CBS.
-No country in the Southern Hemisphere has ever hosted a Winter Games.
-Three continents – Africa, South America, and Antarctica – have never hosted an Olympics.
-A record 202 countries participated in the 2004 Olympic Summer Games in Athens.
-Only four athletes have ever won medals at both the Winter and Summer Olympic Games: Eddie Eagan (United States), Jacob Tullin Thams (Norway), Christa Luding-Rothenburger (East Germany), and Clara Hughes (Canada).
-Speed skater Bonnie Blair has won six medals at the Olympic Winter Games. That's more than any other American athlete.
-Nobody has won more medals at the Winter Games than cross-country skier Bjorn Dählie of Norway, who has 12.
-Larrisa Latynina, a gymnast from the former Soviet Union, finished her Summer Olympic Games career with 18 total medals—the most in history.
-The United States Olympic Committee established the U.S. Olympic Hall of Fame in 1983 to recognize outstanding American Olympic athletes, however, a plan to build a hall has been suspended due to lack of funding.
-The Summer Olympic sports are archery, badminton, basketball, beach volleyball, boxing, canoe / kayak, cycling, diving, equestrian, fencing, field hockey, gymnastics, handball, judo, modern pentathlon (shooting, fencing, swimming, show jumping, and running), mountain biking, rowing, sailing, shooting, soccer, swimming, synchronized swimming, table tennis, taekwondo, tennis, track and field, triathlon (swimming, biking, running), volleyball, water polo, weightlifting, and wrestling.
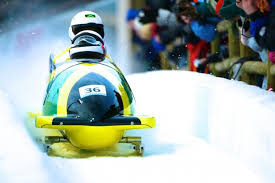
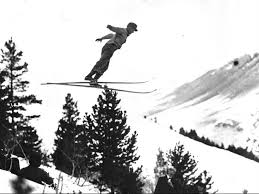
-The Winter Olympic sports are alpine skiing, biathlon (cross-country skiing and target shooting), bobsled, cross-country skiing, curling, figure skating, freestyle skiing, ice hocky, luge, Nordic combined (ski jumping and cross-country skiing), skeleton, ski jumping, snowboarding, and speed skating.
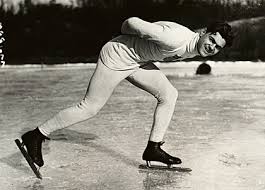
Chamonix, France in 1924.                                                                              Sochi, Russia 2014
ice skating 2014
ice skating


bob sledbob sled 2

ski jumpski jump

Philip Seymour Hoffman

Philip Seymour Hoffman

philip seymour hoffman

Fell victim to his addiction to heroin

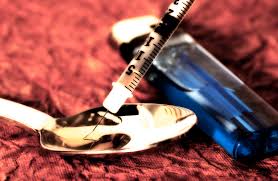
 Oscar-winning actor Philip Seymour Hoffman was found dead of an apparent heroin overdose — with a hypodermic needle still stuck in his arm and 70 baggies of the drug inside his Greenwich Village pad Sunday, authorities said. He was 46.
The acclaimed screen and stage star was discovered in his underwear on the bathroom floor of his $9,800-a-month rental after missing a morning appointment to pick up his three young kids from their mother, his estranged girlfriend, Mimi O’Donnell.
He was declared dead at the scene, a needle in his left forearm. A source said it was clear that the “Capote’’ star had been dead “for hours.”
Cops found five empty glassine envelopes in a garbage can, two more under the bed and one on a table in the apartment, along with a charred spoon in the kitchen sink, sources said.
“He was shooting up in the bathroom,” a law-enforcement source said.
The drug envelopes were marked “Ace of Spades,” which sources said is a brand of heroin that has not been seen on city streets since around 2008 in Brooklyn.
Police later executed a search warrant and found 70 glassine envelopes of heroin inside a desk. In addition to the “Ace of Spades,” investigators also found packages marked “Ace of Hearts” and one with a playing-card jack stamped on it.
Hoffman’s body was found at about 11:15 a.m. by a screenwriter pal, David Bar Katz, and Isabella “Bella” Wing-Davey, Hoffman’s personal assistant, who performed CPR. They called 911 at 11:36 a.m. Hoffman was pronounced dead at 11:45 a.m.
Philip Seymour Hoffman was on a heroin binge 6 weeks before he died, and told friends he feared he was destined to fatally over dose.
Back in December Hoffman told them he had started injecting himself with heroin and couldn't kick it.  Hoffman said he would kick it for a few days and then fall off the wagon.
He went back to AA in a desperate attempt to clean up ... but much to his great frustration it didn't work.
During the last 6 weeks he often looked disheveled and dirty.  At one point someone asked him how bad his problem was, and he responded, "If I don't stop I know I'm gonna die."
We're told Hoffman was also drinking excessively ... which opened the door to many bad decisions when it came to heroin use.
Ironically and sadly, we're told Hoffman went to AA meetings over the last 4 years and was considered a "guru," because he had been sober for so long.  Hoffman would give inspirational talks to people who attended.
The deadly truth:
addicted to heroin
Drug overdose deaths in the United States have risen steadily since 1970. Painkillers actually kill more Americans than heroin and cocaine combined, according to the Centers for Disease Control, but heroin is still one of the No. 1 killers of illegal drug users. Only one in 10 heroin overdoses ends in death.
Overdose deaths from heroin have increased recently, and heroin use is also on the rise. In 2011, 4.2 million Americans over the age of 11 had tried heroin at least once, according to the National Institute on Drug Abuse.
An estimated 23% of them will become addicts. And it's addicts who die more frequently than new users, studies show.
How heroin works:
Heroin is most often mixed with water and injected. Injecting it minimizes the lag time between when the drug is taken and effects are felt -- with injection, the effects are almost immediate.
It can also be smoked, snorted or eaten, but smoking or eating destroys some of the drug and mutes its effects.
When someone takes heroin there is an immediate rush. Then the body feels an extreme form of relaxation and a decreased sense of pain.
What's happening inside the body is the heroin is turning into morphine. Morphine has a chemical structure similar to endorphins -- the chemicals your brain makes when you feel stressed out or are in pain. Endorphins inhibit your neurons from firing, so they halt pain and create a good feeling.
Morphine, acting like your endorphins, binds to molecules in your brain called opioid receptors. When those receptors are blocked, that creates a high.
This eye opener story has showed many people that anyone can fall victim to addiction! Don’t neglect the signs and if you see anyone that is In need of help please reach out to them! You might just save their life!

Thursday, September 5, 2013

Family Survival List

Family Survival List


Putting together an emergency plan seems like a daunting task but if you are ever in an emergency situation you will be glad you took the time to plan and include your family. I am sure you are thinking it now; if an emergency situation arose and you did not have a plan in place your first thought is going to be “what am I going to do to protect my family?” Putting a plan in place will put you in a position to keep your family safe.
First things first, water and food are your most basic essentials. Ready.gov suggests a three day supply for each person in your group. Just how long a person can live without food differs because of factor such as health, weight, age, etc., but water is a must have. Since water is heavy to carry and transport we recommend not only having a water supply but also having water filtration supplies such as filters or purifying tablets/drops.
Protection is also important. Having protection (yes, weapons) in your home is one thing, but knowing how to use them is another. You want to be able to handle any situation, but it is also important that everyone else in your household be able to do so. You may have young children, so you will need to find your own comfort level with teaching your kids how to protect themselves. What I like to tell people is to plan for the worst and hope for the best. Ask yourself: How will (fill in the blank) be able to protect themselves if I am not here?
At this point you are already putting a lot of thought into what you need to do to keep your family safe, but you’re not quite done yet. Watch this video on how FEMA is trying to get kids to educate their parents. Their thought is that the average American won’t listen to FEMA but maybe the kids will and then educate their parents. Obviously, having the luxury of staying in your home in the event of an emergency is preferable to anyone. After all, you have all of your belongings, tools, food, etc. as well as the comfort of your home and a locked door. But you may not be so lucky, so an exit plan is a must.
What is the quickest way out of town? What are alternate routes? Where will you go? Does your city have emergency shelters, and where are they? What shelters accept pets? Keep all of this listed in a convenient place and update it regularly. Subscribe to your city’s reverse emergency notification system. In addition create a special plan for you and your family members in the even that you have to meet to evacuate. You might not all be sitting at home together when an emergency arises. You may be at work, your kids may be at school, and your spouse may be running errands. Have a plan specifically for getting your family together first, and then proceed to a shelter/out of town/etc. You may need more than one plan and that’s OK, just make sure that your entire family knows the plan and practices it. It is always better to be safe than to be sorry.

Duct Tape

Survival Blog

Survival with duct tape

Duct tape is an incredibly useful product to have around the house; it is readily available and inexpensive. It has many practical applications including uses in survival situations. The metallic gray color can be somewhat offensive to the eye, so fortunately it is also available in a variety of colors and designs at your local hardware store.
Duct tape is durable, strong and waterproof so it makes for an excellent patch in many situations. Here is a list of just a few things:
-        Repair your rain gear: have a tear or rip in a water repellant article of clothing? No problem! Just cut a piece of duct tape to completely cover the hole, inside and out, and it works just as well as it did before you got the rip!
-        Avoid chiggers: when walking through a leafy or wooded area, tuck your pant legs in to your boots and duct tape all the way around to keep chiggers away from your skin.
-        Repair a tent: Have a rip in the side of your tent? Patch over it, inside and out, with duct tape to completely cover the tear.
-        Create a makeshift butterfly bandage: cut duct tape into three small strips, one smaller than the other two. Place the smallest (sticky side to sticky side) across the other two, leaving the width of the smaller strip between the two.
-        Mark your trail: leave small pieces of duct tape on trees or other markers along your path. This works really great if you have neon colored duct tape.
-        Make cordage: duct tape is very strong, so twisting one piece of duct tape into a makeshift cord may be good enough, but if you need something stronger twist multiple pieces together.
-        Affix a bandage: you don’t want the “glue” of duct tape to affix to a wound, but take a piece of gauze or cotton completely covering your wound and cover with duct tape.
-        Close a hole in your water bottle/container: clean and dry the surface and affix enough duct tape over the hole, since it is waterproof you will not have any more leaks.
-        Mend shoes/clothing: apply duct tape to torn/ripped/cut area. If you have an iron to iron over the duct tape it will make the repair more permanent.
-        Repair a broken fishing pole: Did your fishing pole snap? Find a sturdy stick nearby and duct tape it to the pole (piecing it back together of course). Make sure the stick overlaps the broken section and the duct tape completely covers this section.
There seem to be countless uses to this wonder-tape and it is a must have in any survival situation. Oh yea did I mention the prom drees duct tape? click here to see duct tape prom dresses.

Search This Blog